Do you want to learn Luminati Proxies before you buy? Here is an ultimate guide for beginners of Luminati proxy users, to learn What is Luminati, How it works, and Luminati Proxy Tutorials about how to create a proxy zone, How to set up Luminati Proxy Manager…

The Bright Data (formerly Luminati proxy network) is known to be the most advanced proxy service in the market, packed with lots of advanced features, tools, and offerings that keep them ahead of their pairs.
Unfortunately, this comes at a price, and the price is not unrelated to its complexities which has made it a difficult proxy service for newbies. You cannot just log into the control panel (user dashboard) and get proxy address, port, username, and password as you would in other providers such as Decodo (formerly Smartproxy) – Bright Data (formerly Luminati) does not work that way.

The process is quite different and can be overwhelming for the newbie, but when you grasp the process, you will not only understand how easy it is, you will just know that it’s just trying to set the pace as a next-generation data extraction service that offers proxies.
In this article, we would be walking you through the process of setting up Bright Data formerly Luminati proxy networks, and using them for your Internet marketing tasks, social research, or just entertainment. Before that, let take a look at what the service is and how it works.
What is Luminati?
Bright Data, formerly known as Luminati Networks, is a leader in the proxy market. It offers proxies in the residential, datacenter, and mobile proxy categories. Aside from proxies, it has also entered the data extraction market, offering tools and services to those interested in scraping any kind of data from the web with the Data Collector tool as one of its tools for such.
In this guide, we would be focusing on their residential proxies and as such, let take a brief look at an overview of such.

Bright Data formerly Luminati residential proxies are some of the best in the market in terms of reliability, compatibility with popular websites, speed, uptime, and security. The service has one of the largest advertised proxy pool sizes in the market, with over 72 million residential IPs in it sourced from all countries, states, and most cities around the world.
With Bright Data (formerly Luminati), you can choose to use proxies from specific countries, states, and cities – a feature known as geo-targeting.

The proxies are rotating proxies but offer you both high rotating ports that change the IP address after every request and sticky ports that maintain session/IP address for up to 30 minutes. Generally, for the sticky ports, you have control over the timing for the IP change, making Bright Data (formerly Luminati) have one of the best session management support in the rotating residential proxy market.
We personally tested the response time and speed in general, and these proxies come second in the market, and to make it even better, it scales up nicely with little performance issues and blocks.

However, it has one major flaw, and that is in its pricing. Bright Data (formerly Luminati) is considered unaffordable to many small marketers because of their minimum monetary commitment.
In the past, you require $500 but has now been reduced to $300. Even $300 is still not affordable to some, making them move to other premium competitors like Smartproxy and Soax, all of which have their pricing based on bandwidth usage. Another major flaw of Bright Data is its complexity, making you require a guide in other to use it.
Luminati Proxy and Hola VPN: The Connection

From the above, you can see that Bright Data (formerly Luminati) has over 72 million residential IPs in its pool. What you didn’t know is that they do not own these IP addresses. The IP addresses through which they route their clients' requests are sourced via Peer-to-Peer(P2P) networks. And that is where the “ethically sourced” buzzword on their website comes from.
A good number of the residential proxy service engage in all forms of shady practices to get access to users' devices in other to use it as a proxy endpoint and get access to their IP addresses.

In the case of Bright Data (formerly Luminati), they have got Hola VPN. Hola VPN is a VPN solution that offers Internet users its VPN software for free in exchange for their device joining its P2P network. Once a user installs the application on his device, his device becomes an exit node for Bright Data (formerly Luminati) and would be used for routing paid users' requests.
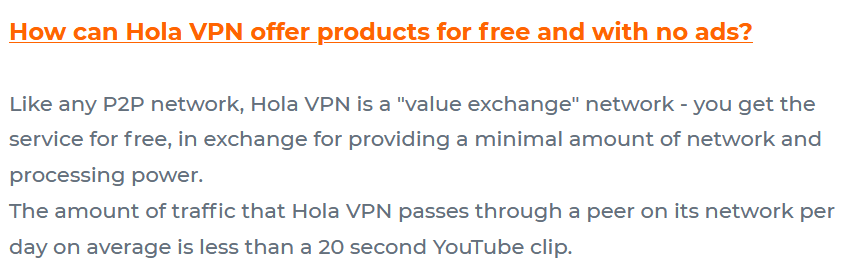
If you do not want to share your IP, then you will have to pay to use Hola. Users are being told before opting in, and that is why Bright Data (formerly Luminati) IPs are ethically sourced.
How Does Luminati Residential Proxies Works?

The Bright Data (formerly Luminati) residential proxies provided the workings of the model of residential proxies for others to follow. Because of the introduction of P2P and devices in it into the mix, the model changes from regular proxies that you send web requests through them, and they just resend the web request masking your real IP address.
However, regardless of the differences, they all keep your IP address anonymous even though residential proxies come with more power because of their undetectable nature.

With Bright Data (formerly Luminati) residential proxies configured on your web browser, your web requests do not go to the intended website directly. Instead, it goes to the Bright Data (formerly Luminati) proxy server, which then looks into its pool to randomly choose an active device to route the request through.
When the request gets to the device, the device then routes it to the intended website. Because the request was received from the device in the P2P, your real IP address and that of Bright Data (formerly Luminati) are not seen, making proxy usage undetectable when using Bright Data (formerly Luminati) residential proxies.
Are you looking forward to learning how to make use of the Bright Data (formerly Luminati) proxy network? We have written for you a guide that would walk you through the important steps you need to follow to set the ball rolling.
How to Use Luminati Residential Proxies

From the above, you already have an idea of what Bright Data residential proxies are and how they work. Now let move straight to the business of the article – showing you how to use the proxies.
Step 1: Account Registration and Purchasing a Residential Proxy Plan
The first step toward using proxies from the Bright Data (formerly Luminati) proxy service is to create an account and add funds to your account. The service is paid, and as such, without doing this, you cannot use the except you only need to use their free trial. In our case, we did not pay for any specific package – we use the pay-as-you-go plan which is convenient to us.
To create an account, simply visit the official Bright Data (formerly Luminati) website and click the “Start Now” button. This should take you to the registration page. When you’re done registration, log into the control panel, go to the billing area, and add funds to the account.
Step 2: Add a Proxy Zone
For you to be able to make use of proxies from Bright Data (formerly Luminati), you will need to add a zone. This zone will provide you the option to configure the type of proxies, location, target site, and many more. To add a zone, go to the proxy page and click on “Add Zone”. This should open an interface where you will configure the new residential zone.

You can neglect the target site field. For the network type, choose residential – there are other options such as datacenter, ISP, and mobile. For the Zone detail, fills in the required details. For the name, I used “brightdata 101” you can use any value. For the “Exclusive gIP’s type,” leave it at shared. For permission, tick only country. If you tick the other options, the pricing will go up.
Click on the “Add Zone” button, and the new zone would be added successfully. We would be using the zone in this article for our tasks.
Step 3: Get Proxy Details for Integration
With the residential proxy zone added, you can now get the details for the proxy (proxy address, port, username, and password) for integration. How you do that is simple, go to the “API &Integrations” Menu, then select “Proxy & Web Unlock API.” From the page, you will see a good number of popular programming languages; choose the “Other Software” option.

For the zone option, select from the drop-down menu the brightdata101 zone we created earlier. For exit node country, choose the country you need proxies from and if you do not have any specific one in mind, select the “any country” option. Leave other options as they are, except you know what you’re doing.
The next section on the page contains the proxy details. Write down the proxy address, port, username, and password as this is what you need to configure the proxies.
Step 4: Configure/Integrate Proxies with Software/Browser
Use the copied proxy information to configure proxies on the software you need proxies for. It could be a browser, a bot or web scraper, a multi-profile browser software, or even a proxy client like Proxifier on PC and Postern on Android. Each software has its own guide on how to configure proxies.
However, you need to know that proxies work at the application level and as such, global proxy settings would most likely not work. If you need to force all of your network traffic via the proxy server, then you will need to use a proxy client such as Proxifier.
How to Authenticate Using IP Whitelisting
If you take a look at the above, you will see that username and password authentication is used. However, the Luminati proxy service does support the IP authorization method for authentication.
To whitelist your IP address, click on the zone you want to whitelist your IP address for. Under the settings, you will see the “Whitelist IPs” option. Click on the pencil icon to add your IP address.

If you do not know your computer IP address, visit the IPinfo.io website to check your IP address and use it. With that, you would not have to worry about using a username and password for authentication.
How to Use Bright Data Chrome Extension and API
Pricing note: Bright Data's recurring monthly credits are a web-data evaluation path for Web Unlocker, SERP API, Web Scraper API, and Scraper Studio; they do not cover residential, ISP, datacenter, mobile proxy bandwidth, or Browser API.

The above guide shows you how to use Bright Data (formerly Luminati) proxies on tools that support proxies, such as bots, crawlers, scrapers, and other client applications. If all you need is to use proxies on your Chrome browser, then all you need to do is install the Chrome extension on your Chrome browser, and you are good to go.
You can download it from the Bright Data control panel on the Chrome extension page. Using Bright Data (formerly Luminati) Chrome extension is the easiest way to use Bright Data proxies. With this, you do not have to deal with configuring proxy address, port, username, and password anything you want to switch country. All you need to do is to install it from the Chrome store here.

With the extension installed, you need to sign in to your account and then whitelist your computer IP address from the control panel. To do this, go to the proxy section, look out for the brightdata101 zone we created and click on the pencil icon to edit it. A page like the below we open.

Click on the pencil icon in the whitelisted IP and enter your IP address. With the IP address added, go back to the extension and click on the ON button. All you need to do is choose the country you want to surf from and you’re good to go. If you do not have any specific country in mind, choose the “any” option.

Another feature of Bright Data (formerly Luminati) that you would come to like is its support for API. This makes it easy to integrate your proxies directly with your custom script or bot, making it possible for you to access the control panel without necessarily logging into the dashboard using a browser. The API guide is quite lengthy and wouldn’t fit into this article. For that reason, we would provide you the link to the API documentation – click here to access the Luminati API documentation page.
How to Use the Luminati Proxy Manager
The Luminati Proxy Manager app provided by the Luminati proxy service is an open-source proxy manager that was developed for those that want to have more control over their proxies. Aside from using it to access your Luminati proxies, you can use it to manage other proxies as well. Our focus would be on using Bright Data formerly Luminati proxies.
The tool is basically a command-line interface that creates a server and opens up your browser with which you can manage your proxies. You will need to download and install it on your computer from the control panel. Installing might take some time to complete.

With the application installed, launch it. It should show some texts on the command line interface, and when it is done, it will open the 127.0.0.1:22999 in your default browser. If you are logged into your account, then there is no need to do it again; else, you should. The 127.0.0.1 becomes your browser proxy address when using the Proxy Manager – what differs is the port.

To create a new port, click on the “Add new port” button. This would open a new interface for creating the port.

Choose Bright Data (formerly Luminati) as the preferred network. For the zone, you can use the brightdata101 zone created earlier. Click on the Next button and then click on the “Create proxy port.” You should see the port number displayed to you. From below, you can see that the port is 24017. So the proxy address and port become 127.0.0.1:24017.

Go to the list of created ports and click on the port you just created, and click on the “General’ settings tab. Turn ON the “multiple proxy port per IP” and enter the number of ports you need. Go back to the proxy port list and click the play sign next to the original proxy port created. You should see a list of other ports added. All you need to do to use these is to copy the ports and use 127.0.0.1 as the proxy address.
You should use the proxy address and port combo in the application you need to use the proxy. Make sure you have the Proxy Manager application on; else, it won’t work. For authentication, you should copy the username and password for the brightdata101 zone created earlier and use them for authentication.
Conclusion
From the above, you can tell that Bright Data formerly Luminatiis also easy to use, provided you know how to use it. However, there is no doubt that the service is quite complicated to use when compared to most other proxy services in the market.
It is important to know that there is more you can do with Luminati proxies than what we showed you above. They have got video tutorials you can follow on their website to have a better understanding of what you can do with the service and the tools they offer.