Are you looking for a step-by-step guide on how to configure the CCProxy tool? Then you are on the right page, as the article below describes all of the steps required to configure CCProxy.
When it comes to sharing regulated internet within the intranet, proxy servers play a significant role. They essentially serve as a computer bridge connecting end users and the internet. Proxy servers are another method of providing Internet access control besides shared Internet connections. For example, they assist in limiting bandwidth and preventing specific access to restricted websites. Among many other things, they are in charge of filtering inbound connections or messages.
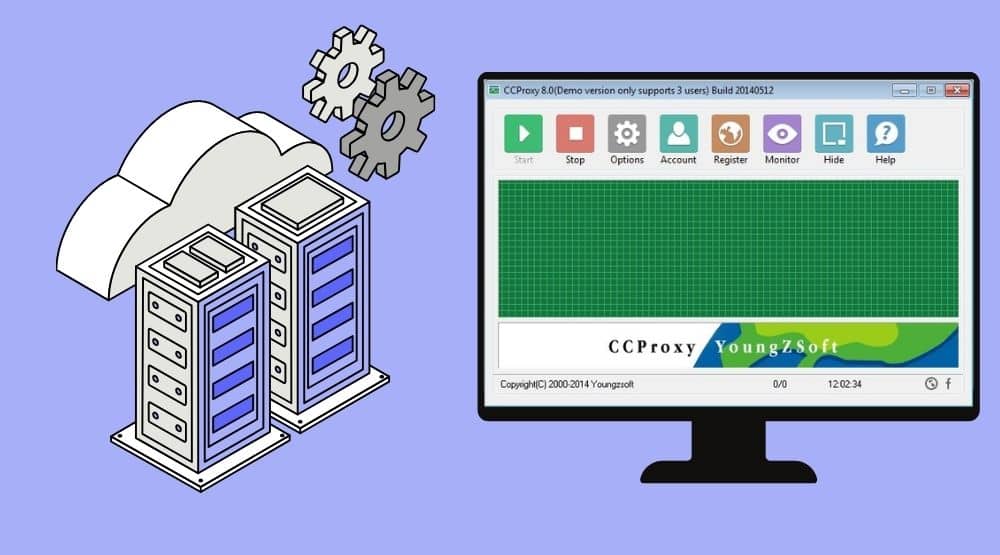
These features are present in nearly all of the proxy server software available today. CCProxy is one that we will be taking into consideration in this tutorial. You can set up a shared proxy for other users using this service. As such, businesses and educational institutions often use the application.
Hence, if you're looking for guidance on how to configure a CCProxy server, this article is for you. I will be taking you through a step-by-step guide on how to configure the CCProxy server. First, let’s highlight some of the things you need to know about CCProxy.
What You Need to Know About CCProxy
CCProxy is lightweight, cost-free, and powerful proxy server software that can be used to share a single Internet connection. The CCProxy Server is capable of functioning as a proxy server for HTTP, mail, FTP, SOCKS, and HTTPS. Even for people who are completely new to networking, setting up and operating CCProxy is straightforward. Thanks to its user-friendly graphical interface. It has strong account management features, such as bandwidth management, content filtering, bandwidth control, Internet access restriction, and time management.
Although CCProxy is frequently referred to as a Windows proxy server, it also works with Mac and Linux-powered devices. For instance, you can use the WINE emulator to run CCProxy on Linux. The program essentially offers effective techniques to create anonymous Internet access, download files, and send and receive emails. Using CCProxy, you can quickly start offering yourself, your school, and your office secure remote access with dependable performance with only a few mouse clicks.
How CCProxy Works
CCPoroxy works similarly to an access point for wireless networks when numerous computers are connected. However, CCProxy distributes proxy servers. This would make it possible for users to send and receive emails, download files, and visit websites. Web browsers like Edge, Google Chrome, Mozilla Firefox, and many others enable you to perform these actions with CCProxy.
Since a web proxy server's web caching feature helps speed up web browsing, users will therefore have all of their settings stored when they connect to the proxy. As such, you have the option to select one or more proxy servers at once with CCProxy because it supports all popular proxy servers. So, with that in mind, let's quickly get into the step-by-step configuration process for CCProxy.
Configuration for CCProxy
Assuming you are an absolute beginner, before configuring, you need to make sure it is installed on your computer. If you have done that, you can go ahead with the other sections of this article; if not, I will walk you through how to install this proxy server software quickly.
Step 1: First, download the CCProxy setup from the download center. Locate the setup in your download folder and double-click it.

Step 2: Follow the steps carefully while clicking “Next”. After installing, click “Finish” to complete your installation and launch the proxy server.
Now we are ready to proceed to configuring CCProxy.
With CCProxy installed on your computer, below is a step-by-step configuration of it.
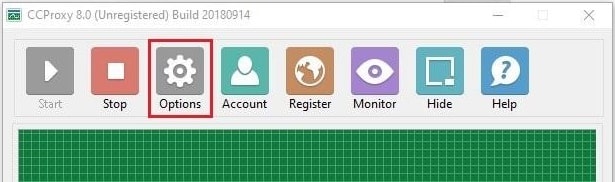
Step 1: Click on the “Options” section.
Step 2: Check the boxes next to the proxy protocols you need to use, then disable the ones you don't. Simply mark HTTP with a checkbox to use the browser. Check the FTP protocol if you need to upload files to your server.
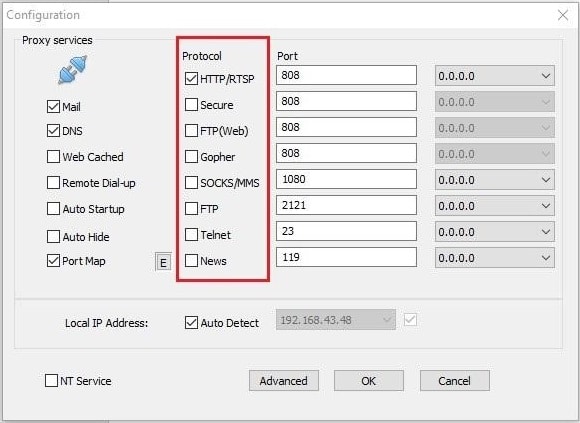
Step 3: You have the option of leaving the default ports untouched or changing them for any other free or open ports.
Step 4: Additionally, you can choose whatever settings you want. This aims to make managing CCProxy more convenient.
When you're finished, click the “OK” button. Although the system is already prepared to launch, we still need to create proxy permissions. This is done to make sure that only you and a few other people can use the proxy. In other words, we need to create restrictions on the use of the server. To do this, follow the steps below:
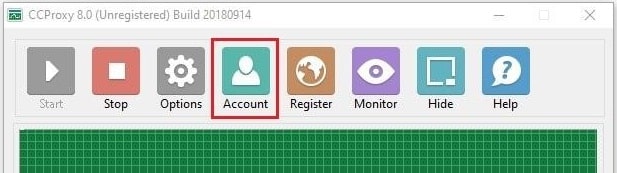
Step 5: Navigate to the “Account” section.
Step 6: In this section, you can now add users that would be able to connect to your proxy. To do this, select “Permit Only” from the “Permit Category” column on the left.
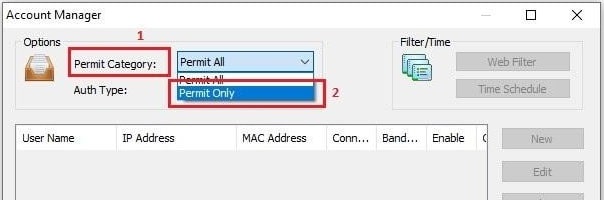
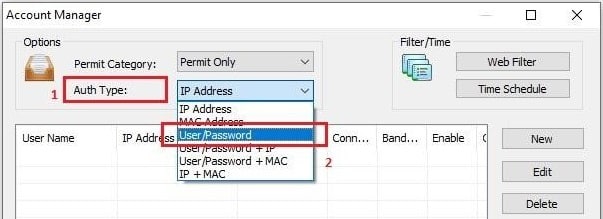
Step 7: Next, we must decide what data the user will use to access the proxy. Here, there are a total of six different authorization categories. They are;
- IP addresses;
- MAC addresses;
- By user and password;
- By user and password + IP addresses;
- By user and password + MAC addresses;
- IP and MAC addresses.
I'll be selecting based on user and password for this tutorial. You can achieve this in the “Auth Type” field, as indicated below.
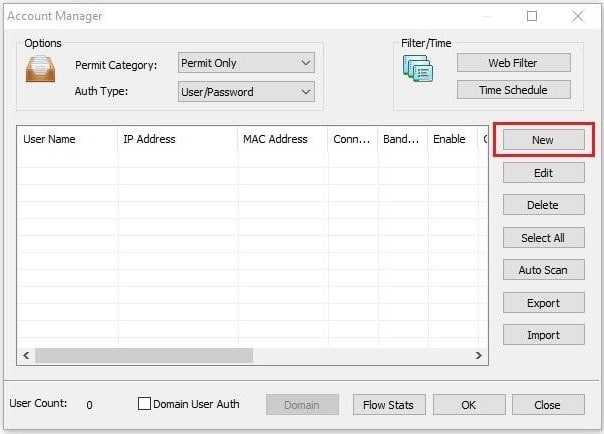
Step 8: Let's add users. To do this, select “New” from the menu on the right of that window. The user settings window will open in a new window.
Step 9: In the first rectangle in the image below, enter a username and password. In the same way, enter the information required for connecting. Keep in mind that it must match the information chosen for the “Auth Type.” If you chose IP-based authorization, only the IP address should be entered in the corresponding field.
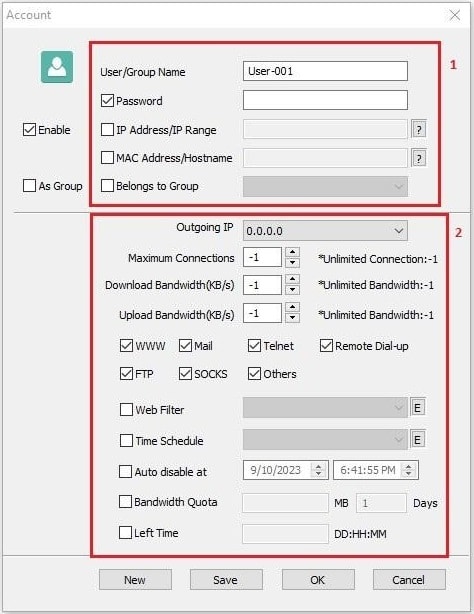
Step 10: In the second rectangle, you can pick which proxy types new users will have access to and establish traffic limits. Additionally, you can choose time filters or limit access to particular web pages.
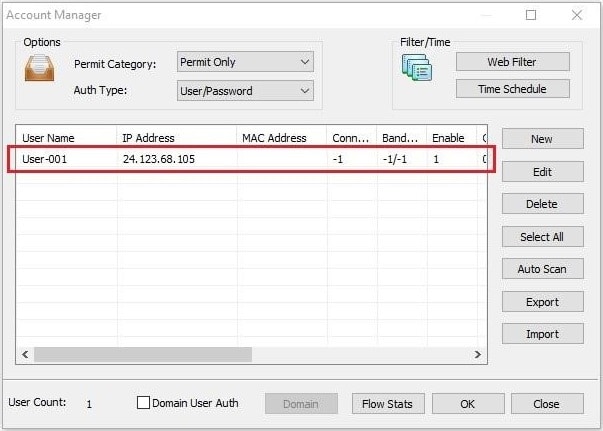
Step 11: Next, first click “Save” and then click “OK”.
Step 12: The box will display the IP address you added. Click “OK” again.
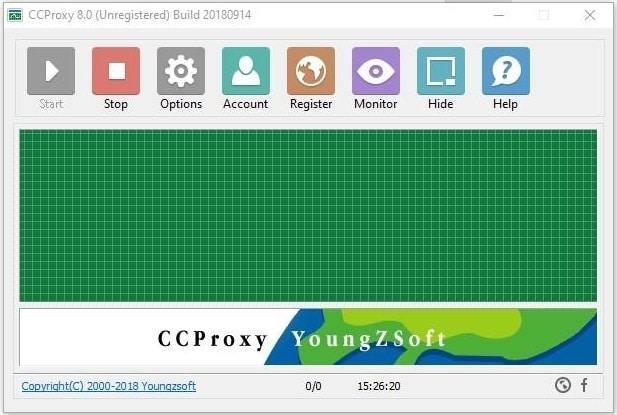
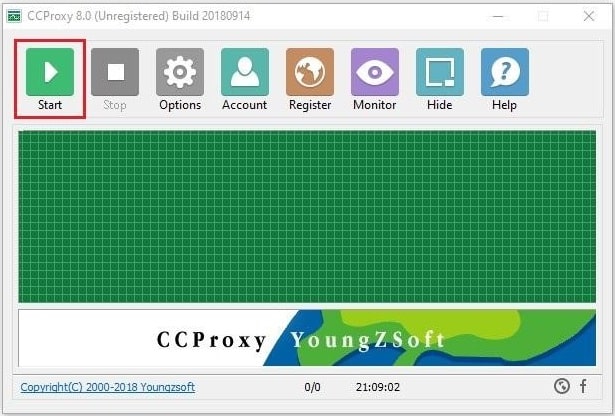
Step 13: After that, click “Start” on the home page to begin.
You now understand how to configure a proxy in CCProxy and distribute it. You can set up the appropriate network filters with the help of this tool, organize safe work, and prevent hacking.
Configuring CCProxy Clients
Having configured the CCProxy web server, I would go ahead and show how to configure the web proxy settings in a few popular browsers. Here, I would be considering Microsoft Edge and Google Chrome browsers.
Microsoft Edge Settings for CCProxy
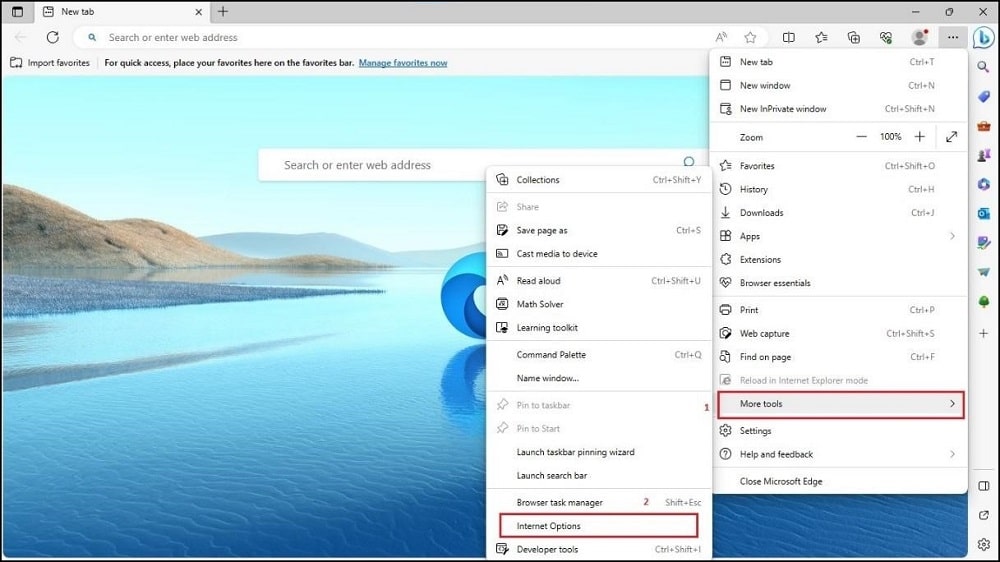
Step 1: Click on the three dots in the top-right corner of Microsoft Edge after opening it.

Step 2: Next, scroll down the dropdown window. Hover on “More tools” and a second window will show up. Scroll down that dropdown and click “Internet Options”.
Step 3: Click the “Connections” tab, then click “LAN settings” in the Internet options window.
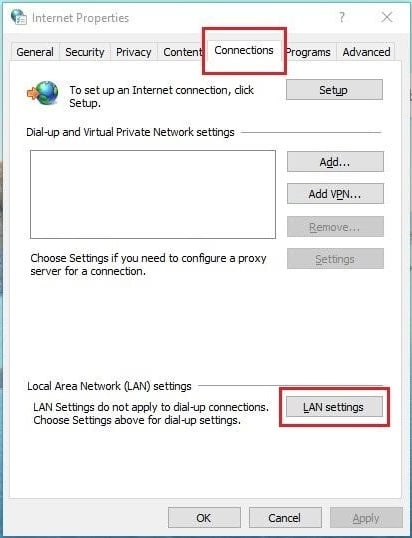
Step 4: Select “Use a proxy server for your LAN” and then click the “Advanced” option.

Step 5: You can choose the proxy IP and port to use once you click “Advanced.”
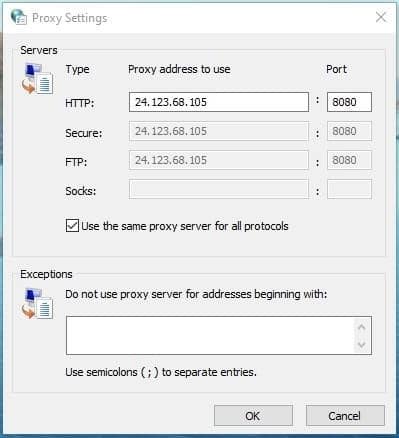
Set up the CCProxy server's parameters. To save the changes you've made, click “OK” on each sub-opened window.
Google Chrome Settings for CCProxy
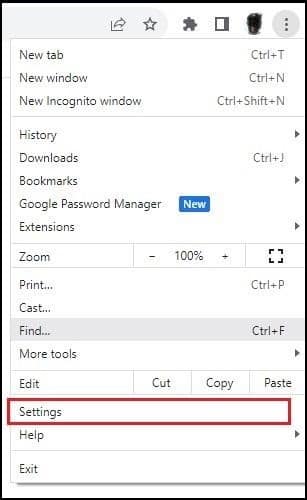
Step 1: Open your Chrome browser and click the three dots at the top-right corner of the screen.

Step 2: Scroll down the pop-up drop-down window and click “Settings”.
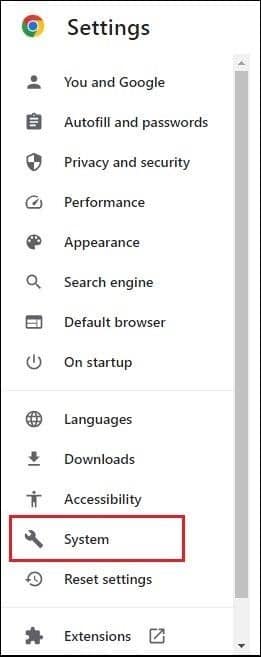
Step 3: Next, click on the “System” tab on the side menu bar.
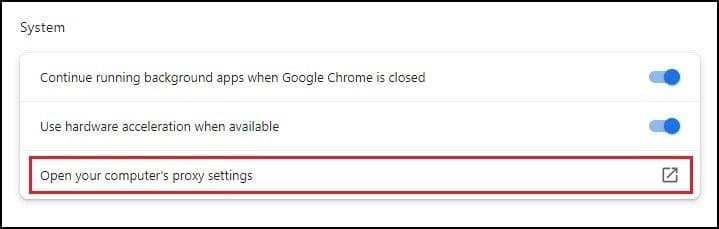
Step 4: Next, click “Open your computer’s proxy settings” to configure the proxy.
Step 5: This would open the system's proxy settings.
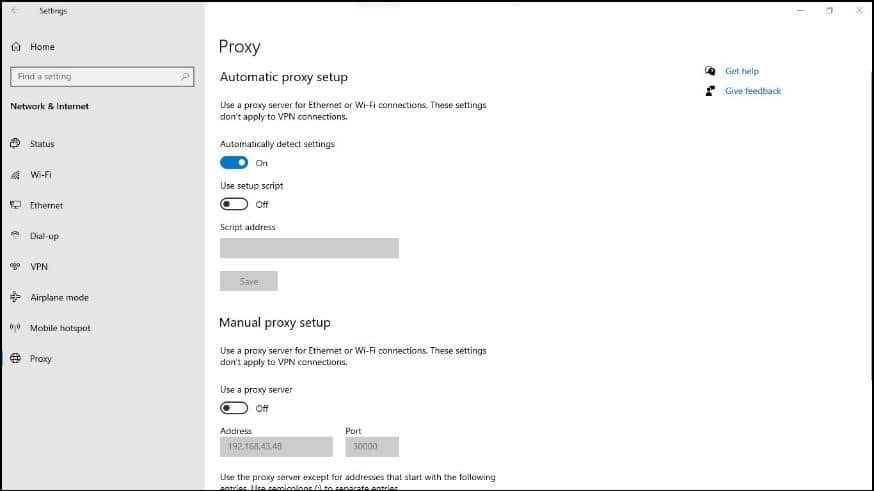
Step 6: Select the “Use a proxy server” toggle to configure the proxy.
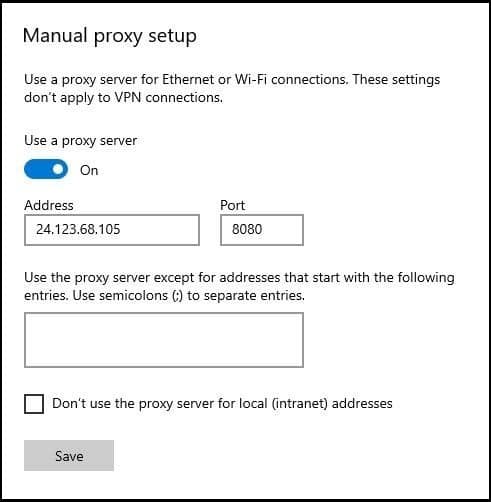
Here you can input the IP address and port of the CCProxy that was set up just like we did for Microsoft Edge. You can also tick the box if you don’t want to use the proxy server for local addresses. Once you are done, click “Save” and you are done.
FAQs
Q. Is The CCProxy Configuration Secure?
Yes, CCProxy is completely secure. In particular, this proxy server application is safe because it is virus-free. Neither your information nor your computer would be attacked. When setting up the antivirus program, a CCProxy-specific rule can be made. As such, CCProxy wouldn't affect or restrict your Internet speed.
Q. What Is the System Support Required for Configuring CCProxy?
While CCProxy is supported by other operating systems like Mac and Linux, the most recommended operating system for this proxy server software is Windows. Hence, CCProxy is a Windows-based proxy server software. From as old as Windows 98 SE to the current Windows 11, CCProxy is fully supported.
Q. Is CCProxy Free or Paid?
Although there is a premium version of the proxy server software, it is essentially free. In a sense, the subscription version allows for unlimited users, but the free version only allows for three different users.
Conclusion
Now you know how to set up CCProxy for sharing internet connections. I have also helped to show you how to configure the two most popular Windows browsers to use the CCProxy server we have configured. So, depending on what your use case may be, configuring CCProxy can get you there.