Are you looking to have control over your proxy network when you are surfing anonymously? Then you are in the right place. The information in this post will show you how to create and customize your own proxy network using Node Unblocker.
The Internet has several advantages, particularly in the fields of data collection and digital marketing. However, because there are so many cyberattacks, websites have learned to guard their domains relentlessly. However, there are some simple tasks that would necessitate browsing the internet anonymously. Some of which include web data scraping and accessing valuable geo-restricted content.
As such, using a web proxy is one of the best ways to browse the internet more privately. Apart from securing your privacy, web proxies can also help you get around various restrictions and avoid blocks and bans. You can either buy an expensive off-the-shelf web proxy or create your own using a web proxy package like Node Unblocker. In order to route all incoming requests through a proxy, Node Unblocker will add an extra layer, regardless of the website you are attempting to scrape or access. This can be quite beneficial for freely browsing and scraping websites.
In this article, we'll explain what a Node Unblocker is and how you can use it to create your own web proxy in order to get around internet censorship and anti-web scraping tools. We would also examine its advantages and disadvantages further. Let's begin, then.
What is Node Unblocker?
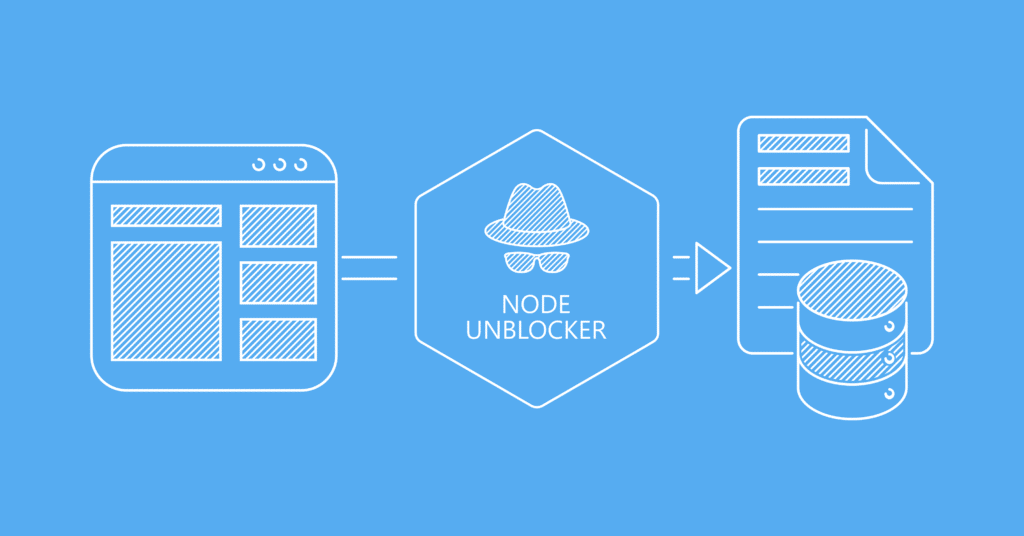
Node Unblocker is essentially a web proxy that enables you to access blocked or restricted content on your target website. Node Unblocker is, in other words, a multipurpose library for proxying and modifying remote websites. It's a Node.js package with an Express-compatible API that enables easy setup of your proxy. It has a very flexible JS interface and can be used in a variety of ways. Any Node.js developer who has prior experience with Express will find it simple to use the proxy server.
The ability to use the Node Unblocker as a REST API is a key difference between a traditional HTTP or SOCKS5 proxy and a node unblocker proxy. As such, the REST API endpoints that the Node Unblocker exposes are how browsers and web scrapers communicate with it. You only need to add the page's URL to the proxy endpoint if you want to retrieve it.
The content is extracted by the Node Unblocker server using the IP address of the computer it is currently operating on. Node-Unblocker is a very fast and effective proxy choice since it makes sure that all the data is processed and transmitted to the client without needless buffering. Additionally, it is very adaptable and can be useful in a variety of ways thanks to its JS interface.
In essence, a node unblocker server enables you to browse the internet anonymously, access geographically restricted content, and even scrape data from a website without being detected or banned. For instance, if you want to use AJAX calls to scrape data from a website or behind a login wall, this proxy can help.
However, you should be aware that this wouldn't be effective if your aim is a Google or Facebook-related website. That being said, let's look at how to set up Node Unblocker.
Setting Up Node Unblocker
Node unblocker server setup is simple and straightforward. You would however need to install all the necessary dependencies. As such, be sure to have Node.js and npm installed on your computer in order to set up the node-unblocker. You can do it by using a version management application like nvm or by referring to the official documentation from the Node.js website. Make sure to follow along with this tutorial as we go through the processes.
Step 1:integrate Node Unblocker server
You need to integrate the Node Unblocker server with an API server like Express after installing Node.js on your computer. This can be done using the npm command:
npm init -y

npm install unblocker express
Express is a straightforward web framework that can help Node.js developers quickly build servers. The use() method of the Express-compatible proxy enables you to establish a connection between the proxy instance and the Express server. On the other hand, the package name for Node Unblocker is Node Unblocker. In the code above, an Express app, a new unblocker instance, and npm are all initialized.
Step 2: build the Node Unblocker server
Let's build the Node Unblocker server by creating an app.js file. Observe the code below:
// app.js

var express = require('express')
var Unblocker = require('unblocker');

// This Creates Express Server
var app = express();

// This Creates Unblocker Instance, and Configure your Express Server to Use It
var unblocker = new Unblocker({prefix: '/proxy/'});
app.use(unblocker);

// Launches Server on Port 8080

app.listen(process.env.PORT || 8080).on('upgrade', unblocker.onUpgrade);
console.log("Node Unblocker Server Running On Port:", process.env.PORT || 8080)
Your dependencies are first required in the code above. It then went ahead and started a new Unblocker instance and Express app. Additionally, only the prefix property is set, as you would see. This goes one step further by indicating the path, in this example, “/proxy/,” at which the proxy can be accessed. To connect the proxy instance with your Express server, all you have to do is call the use() method, thanks to the API's compatibility with Express. This implies that you can use the listen() method to launch your Express server.
If everything went according to plan, this basic server would be running at localhost:8080 or the PORT environment variable you specified when it was launched. Additionally, we have added the .on (upgrade handler) to the app. listen process.env.port 8080. This is helpful for informing the proxy if the connection protocol switches from HTTP to WebSocket.
Testing The Server.
Now that you have setup the Node Unlocker proxy server, you will need to test it to be sure it is working properly. Implement this by first running the script using Node.js.
node app.js
The console.log() message should appear in your terminal if everything is done right. Take a URL and attach localhost: [PORT]/ proxy/ to ensure the proxy is working. For instance:
http://localhost:8080/proxy/https://www.amazon.com
Using the curl command, you can attempt this in your terminal as well. Even better, just type the aforementioned URL into your browser's URL bar to test the Node Unblocker server. The request is made using the IP address of the computer executing the server when it is sent through the Node Unblocker server. The IP address won't change if the Node Unblocker is being used locally. You must deploy the unblocker to a remote server if you wish to modify the IP address.
If the proxy has any problems, be sure to set the DEBUG environment option so you can see the full details of each request:
DEBUG=unblocker:* node index.js
Deploying to Heroku.
Now that we are sure the server we created works properly, let's look at how to deploy it to Heroku. To use the Node Unblocker proxy server you just created, you simply need to deploy the server on a remote server and send requests to it. One such remote server is Heroku. You can deploy your proxy server anywhere; however, Heroku is one of the simplest options with a free plan.
Configuring The Server for Deployment.
You must first change your package.json file to include the setup information for the server in order to deploy the proxy server to Heroku, or any other hosting provider for that matter. This will enable you to use the hosting provider's machine's IP address. In this situation, Heroku's computer.
{

"name": "proxy-server",

"version": "1.0.0",

"main": "app.js",

"private": true,

"engines": {

"node": "16.x"

},

"dependencies": {

"express": "^4.17.1",

"unblocker": "^2.3.0"

},

"scripts": {

"start": "node app.js"

}

}
You've created a script in the code above to instruct Heroku on how to launch your app. It has an engine component that specifies the Node.js version that should be used if you look at it closely. Heroku is further instructed by the start script on how to launch the newly built proxy. In order to prevent pushing unused files and dependencies to your GitHub repositories and your Heroku server, it would also be helpful to create an a.gitignore file.
# Dependencies
node_modules
# yarn error logs
yarn-error.log
# Environment varibales
.env*

!.env*.example
# Code coverage
coverage
The Acceptable Use Policy
The permitted usage policy is something we believe you should keep in mind while you try to install the Node Unblocker proxy application on a remote server. This kind of application cannot always be hosted on a provider's servers. Even then, it would only be under very stringent restrictions.
Regarding Heroku, the company policies prohibit hosting proxies for public use or engaging in web scraping activities without adhering to established robot exclusion guidelines, such as those found in the robots.txt file. You could also be required to supply a distinct user-agent string.
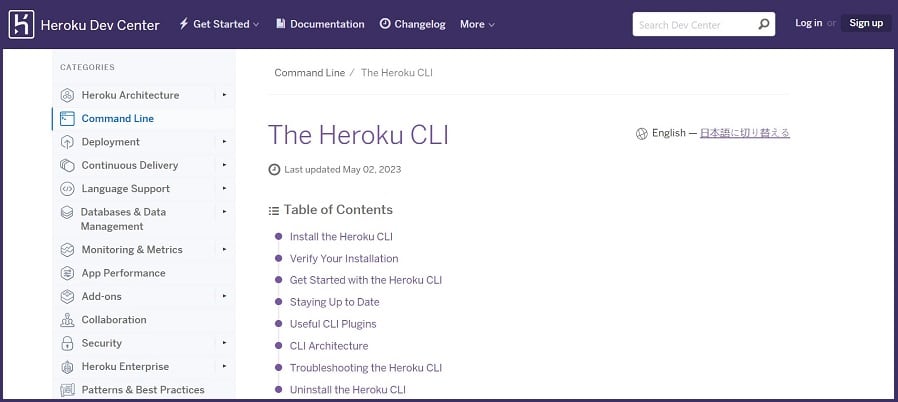
Deploying with Heroku CLI
So, in order to proceed, you would need a Heroku server account. Please visit the Heroku website right away to register for a free account if you don't already have one.
Step 1
If you already have an account, go ahead and install the Heroku CLI tool.
Step 2
The next step is to create a new app using the Heroku dashboard. Use the login command in the CLI to log on to Heroku. This implies that in order to create a new SSH public key, you must provide your Heroku login information through the command line and continue to follow the instructions. On the Heroku dashboard, a new app would also need to be created. Use the following code:
heroku login

heroku apps:create
Step 3
If your login is successful, you'll need to initialize Git in the directory the node unblocker created. The ID, URL, and Git URL for your app should all be visible in the console. Go ahead and set a remote origin for the just-established Git repo using the ID.
git init heroku

git:remote -a [the_app_ID]
Step 4
All that's left to do is use git to deploy your code to Heroku and commit it.
git add .

git commit -am "Initial commit"

git push heroku master
If you have done everything correctly, your Heroku app URL should allow you to access your proxy. Visit this link to see if it's functioning properly: https://[the_app_ID].herokuapp.com/proxy/https://www.amazon.com. This request would be forwarded through Heroku in this situation. On the other hand, as soon as it got the request, Amazon's server would see Heroku's IP address. Interestingly, you can use this Node Unblocker proxy server as a standalone service or a combination of it and a headless browser like Selenium or Puppeteer, especially in web scraping scenarios.
Generating the Node Unblocker Proxy Network.
It is also possible to scale the previous scenario and create your own proxy network or pool using it. If you distributed Node Unblocker servers on several devices, this would be quite useful. You can install the Node Unblocker proxy server on several Heroku machines as a means of scaling a proxy pool.
Additionally, you can go ahead and rent relatively inexpensive remote servers, which start at around $2.00. After that, you would need to set up your web scrapers or bots to send each request to a different server from this proxy network. An illustration of a Python request scraper is shown below:
import requests
from itertools import cycle
## These are the Node Unblocker Proxies
list_proxy = [

"https://200.450.15.30:8080",

"https://200.450.15.31:8080",

"https://200.450.15.32:8080",

]

proxy_cycle = cycle(list_proxy)

proxy = next(proxy_cycle)

for i in range(1, 10):

proxy = next(proxy_cycle)

print(proxy)

proxies = {

"http": proxy,

"https":proxy

}

r = requests.get(url='https://www.amazon.com', proxies=proxies)

print(r.text)
Another approach may be that you want to scrape geo-restricted content, let's say a France-restricted web page. By deploying Node Unblocker on this France-based server, you can use its proxy to access websites restricted to the French region. You can implement this with the following code:
let FRonlyUrl = "https://www.anexampleofwebsite.com"

fetch(`https://localhost:8080/proxy/${FRonlyUrl}`)

let proxyPool = [

"https://413.345.11.21:8080",

"https://413.345.11.22:8080",

"https://413.345.11.23:8080",

]

let proxy = proxyPool[Math.floor(Math.random()*proxyPool.length)];

url = "https://www.anexampleofwebsite.com"

fetch(`${proxy}/proxy/${FRonlyUrl}`)
Let's look at one more sophisticated usage of such a proxy: adding extra logic using request and response middlewares.
Node Unblocker Middleware
So far, we have seen how to setup and deploy a Node Unblocker proxy server. However, to unlock more functionalities, you can use Node Unblocker middleware to make the proxy servers very powerful and efficient when using them.
Node Unblocker middlewares are essentially little functions that let you alter requests and responses as they are being received by your proxy server. You can change requests and respond to them faster. Node Unblocker uses middleware to implement the majority of its features. Custom middleware can, however, also be used to take the place of the built-in debug activation.
By including them in the requestMiddleware and/or responseMiddleware arrays, you can alter both outgoing requests and incoming responses.
// app.js

var express = require('express')

var Unblocker = require('unblocker');

// This Creates Express Server

var app = express();

// This creates Unblocker Instance, and Configure the Express Server to Use It

var unblocker = new Unblocker(

{

prefix: '/proxy/',

requestMiddleware: [] // Custom request middlewares go here

responseMiddleware: [] // Custom response middlewares go here

});

app.use(unblocker);

// This launches Server on Port 8080

app.listen(process.env.PORT || 8080).on('upgrade', unblocker.onUpgrade);

console.log("Node Unblocker Server Running On Port:", process.env.PORT || 8080)

You have to set standardMiddleware to false (standardMiddleware: false) in order to alter the middleware that Node Unblocker uses by default. Additionally, go ahead and turn on the desired default middleware.

The feature of Unblocker's Request Middlewares can be used frequently to add unique headers and user agents to your requests.

You can use the following code to add the user agent:

// app.js

var express = require('express')

var Unblocker = require('unblocker');

// This Creates Express Server

var app = express();

// Your User Agent Middleware

function setUserAgent(data) {

data.headers["user_agent"] = "Mozilla/5.0 (iPad; CPU OS 12_2 like Mac OS X) AppleWebKit/605.1.15 (KHTML, like Gecko) Mobile/15E148";

}

// Create Unblocker Instance

var unblocker = new Unblocker(

{

prefix: '/proxy/',

requestMiddleware: [

setUserAgent  // Enable User Agent Middleware

]

});

// Configure Our Express Server to Use It

app.use(unblocker);

// Launches Server on Port 8080

app.listen(process.env.PORT || 8080).on('upgrade', unblocker.onUpgrade);

console.log("Node Unblocker Server Running On Port:", process.env.PORT || 8080)

Additionally, you can set it up to request specific URLs using certain types of headers.

function setUserAgent(data) {

if (data.url.match(/^https?:\/\/google.com\//)) {

data.headers["user-agent"] = "Mozilla/5.0 (iPad; CPU OS 12_2 like Mac OS X) AppleWebKit/605.1.15 (KHTML, like Gecko) Mobile/15E148";

}

}
Benefit of Using Node Unblocker Middlewares
Your infrastructure can become significantly more maintainable if you use Node Unblocker middleware. This is because you can extract a lot of information about your proxy setup from your proxy server using the requests and responses middleware with Node Unblocker. Hence, your proxy server would have this logic and would apply it to every request it receives from your scrapers, saving you from having to manage and maintain proxy header and user-agent configurations in each of your scrapers or bots.
Why You Should Use Node Unblocker?
Node Unblocker has become one of the most popular and helpful tools for users who want to access restricted content. There are quite a number of benefits you stand to enjoy when you use Node Unblocker. Let's get to see some of them.
-
Access to Geo-restricted Content
Node Unblocker ensures that its proxy server gives you access to content that is restricted to users within your region. It ensures that any websites you visit will display the IP address of that reliable server rather than your own.
Furthermore, using the proxy server is legal. In this way, if you connect to a server, let's say in Germany, it will assume that you are actually there for the time being. With this, you can access a lot of sports streaming or video streaming websites and their opportunities that otherwise wouldn't be accessible in your region.
-
Capable of Bypassing Internet Censorship
Node Unblocker not only helps people access blocked streaming services, but it can also get beyond most forms of restrictions imposed by the government. The availability of the internet is significantly reduced for the citizens of countries like China and North Korea, whose governments have prohibited access to websites like YouTube and Google.
Hence, these restrictions can really place limitations on individuals in these regions willing to do things like research, write content, gather information, access family and loved ones, etc. These people can perform thorough investigations on sensitive topics and communicate with anyone they choose while staying anonymous by using a Node Unblocker.
With no problems arising. It is essential to use Node Unblocker with a confused server if you live in a nation with strict web censorship and if you really need access to good information. It would ensure your safety and privacy because these censorships may have adverse consequences if you are discovered.
-
Enhanced Internet Privacy
While using your WiFi to browse the internet at home, you may feel secure, but your internet service provider (ISP) can view and monitor your activity. Your data connectivity still leaves you somewhat defenseless.
Interestingly, your IP address can be used by the government and other sites to monitor you and gather a ton of information about you. One of the main ways your ISP makes money is by collecting data and sending it to publicists. Node Unblocker steps in to save the day in this situation.
You can be sure you are browsing the internet anonymously. The Node Unblocker enables you to browse the web through a reliable node unblocker association rather than directly through your ISP.
As a barrier between you and the website, it responds to your requests and controls how the site responds. However, due to the encryption, your ISP won't be able to see your online actions, even though they will be able to determine that you are using a Node unblocker.
Limitations of Node Unblocker
Node Unblocker has limitations, even though it is still one of the fastest and easiest proxy networks to set up on the market. These restrictions can be very challenging to get around, not to mention any maintenance problems you might run into while using a self-managed proxy. The following are some Node Unblocker restrictions that you should be aware of:
-
OAuth Issues
The authentication mechanism used by contemporary websites like Facebook, Instagram, YouTube, and Google is OAuth login forms. Websites using OAuth forms are unlikely to function properly over the Node Unblocker proxy. It covers everything that uses the postMessage() method, to put it simply.
As a result, Node Unblocker causes a library that uses proxy post-message data to fail. Only conventional login forms and AJAX content are functional at present; perhaps, this problem will be resolved in the future.
-
Inability to Work on Complex Sites
The Node Unblocker proxy server also has significant compatibility issues with advanced websites like Twitter, Facebook, Google, and Discord, to name a few. Either the request is denied, or the entire or a portion of the requested content may not appear.
Additionally, there won't be any TCP connection if you attempt to scrape with it. These websites will immediately terminate the connection or present a captcha. However, I'm sure efforts are being made to address these issues so that you can also scrape data from these platforms.
-
Maintenance Challenges
Again, even if you can use Node Unblocker to scrape a website, the number of proxies and their continual maintenance would be the main concern. Proxy servers are complicated services that require a lot of work to run and maintain. The expense of maintenance will grow as a result.
Along with other things, you would need to completely manage your proxy instances and adhere to cloud provider policies. All of these would present a significant issue, particularly when managing a sizable proxy pool.
-
Issues with Cloudflare Detection
Cloudflare detection is also a problem with Node Unblocker. This is primarily due to Cloudflare's free detection service, which is always active. For instance, after obtaining a captcha prompt, Cloudflare can quickly identify YouTube video pages.
Therefore, the vast majority of websites make use of Cloudflare's CDN, which can result in the blocking of your requests. On websites that don't use the CDN server, the Node Unblocker custom middleware we previously explained functions without a hitch.
FAQs About Node Unblocker
Q. How Does Node Unblocker Works?
Simply creating proxy servers that can take the place of your origin IP address is how Node Unblocker works. Your information would be encrypted so that even if your ISP were to notice that you were using a Node Unblocker, they wouldn't be able to monitor your online activities. But for it to work properly, it needs a few dependencies. As such, ensure that all dependencies are present.
Q. Is It Illegal To Create Your Own Proxy Pool With Node Unblocker?
Generating your own proxy pool with Node Unblocker is not illegal. However, there are two things you need to consider if you must use Node Unblocker. First, make sure you are conversant with the “acceptable use policy” of whatever remote server you will be using your Node Unblocker proxy application with. Also, be sure that your target website is not on Node Unblocker’s radar. If you have all these boxes checked, we believe you are good to go with Node Unblocker.
Q. Can Node Unblocker Work on All Websites?
The straightforward answer is no. Node Unblocker proxy servers can be used on a variety of websites, although they perform poorly on those that use the postMessage() method, the Cloudflare CDN, or OAuth login forms. On websites with traditional login forms and AJAX content, it performs better. Therefore, make sure to know what kind of website your target website is before using Node Unblocker.
Conclusion
There you have it, now. What an awesome overview of Node Unblocker and how you can use it to create your own proxy network. These proxy servers can be used for a variety of things, and web scraping is one of them.
Even better, you can rotate these servers on each new request so that each incoming request goes through a different IP address. As such, even while it has a number of advantages, you've also seen that it has some drawbacks. Node Unblocker is a fantastic tool, but be sure to carefully consider other options.