You just paid for your first proxies but did not know to configure them on Firefox browsers? Come in now and discover how to set Firefox to work with a proxy server.

One thing I have come to realize is despite the simple UI design of Firefox; there are still a lot of people that do not know to configure them to use proxies; that’s why this article was written to provide you a tutorial on proxy settings for Firefox. Learn all you need to know about Firefox proxy settings and never look for such a guide again.
I recently wrote about how to configure proxies on Chrome, Opera, and Safari. Both Chrome and Opera are based on the Chromium engine and all work with system proxy settings – no browser level settings for proxies. However, when it comes to Firefox, you have the option of using system-specific settings or going with the browser level proxy settings. All of these would be discussed but before that, let take a look at proxies for Firefox.
Proxies for Firefox
Really, there are no specific proxies to use for Firefox. All proxies will work with it. what you should be mindful of are proxies that will work for your use case. For example, some proxies will work quite well for general browsing but will not be functional when used on Instagram or Twitch TV. What are the recommended proxies to use for Firefox then?
Luminati remains the market leader, no doubt about that. However, because they are expensive, I do not like recommending them to users except if you can afford to use them – and you are a heavy proxy user.
Else, I will recommend you use other providers. For datacenter proxies, I recommend Buyproxies, Squidproxies, MyPrivateProxy, and YourPrivateProxy, among other providers. If you intend making use of residential proxies, you can choose between Smartproxy, Microleaves, or Stormproxies.
Step by Step Tutorial for Proxy Setting on Firefox
Below is a step by step guide on how to set up proxies to work with your Firefox browser to keep your IP Address hidden.
- Launch your Firefox browser, click ‘Open Menu,’ and click ‘Options’ from the popup that appears.
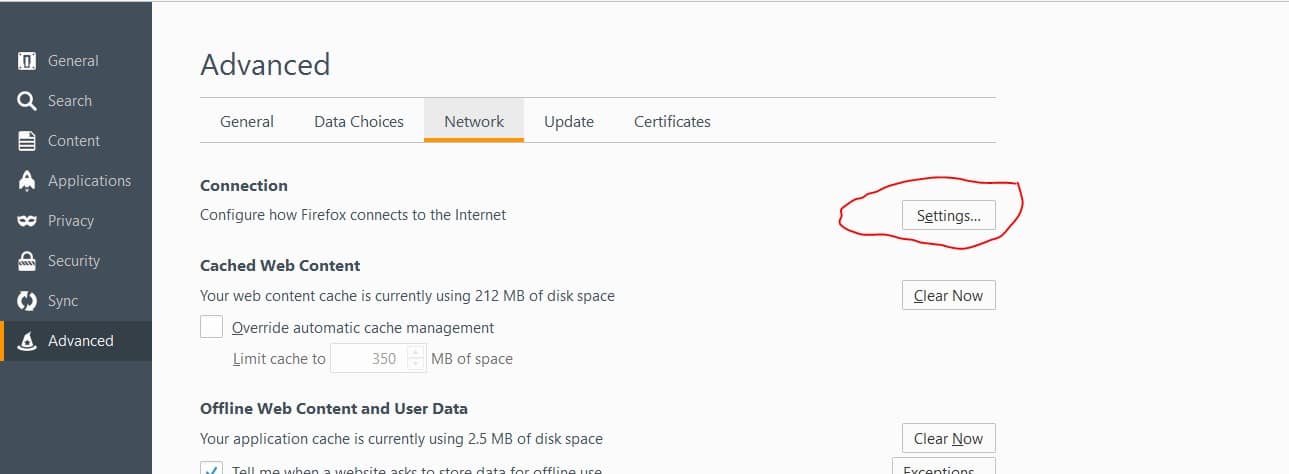
- Click ‘Advanced’ and make sure you are in the ‘Network’ section. Under ‘Connection,’ click the ‘Settings’ button.
- You will see a popup like the one below. It is from this that you will configure the proxies.
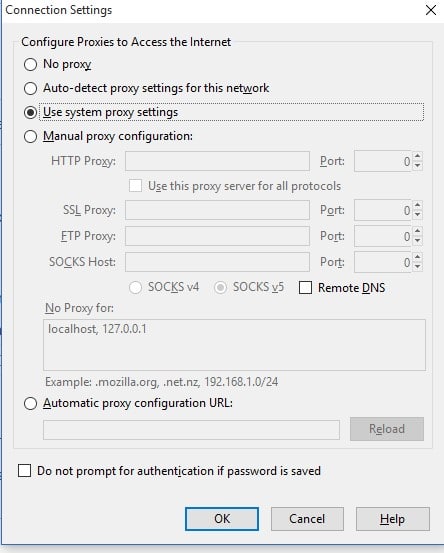
- By default, your browser uses the system proxy settings. To configure your proxies to use browser-specific proxies, choose the ‘Manual proxy configuration,’
- Fill the require information and click the ‘OK’ button, and you are good to go – proxies set!
A Word about Authentication
After the above steps, your connections are routed through the proxy you configured. However, private proxies require you to authenticate before you can make use of them. Usually, when you try visiting any URL, a popup will appear, requesting a username and password – enter them, and you will continue surfing the web. This popup will not appear if you whitelisted your IP for IP Authentication.
Conclusion
As you can see from the above, it is actually very easy to configure proxies on Firefox. The steps may differ in your own case, depending on the version of Firefox and the operating system you are using.
Related,